|
12/30/2001 From the BoB Message Board
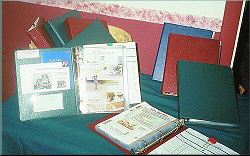
Another perspective on "why
bother" with permanent protected show folders:
As a customer - once we got to August and had FOUR separate catalogs it
just seemed so confusing and like so much paper to look through. I have a
feeling it will be even more so this year - if the regular catty is this
much bigger I imagine spring and holiday will probably follow suit. Having
"show folders" with it all bound together seems like it would be
so much easier to browse through at the end of a show when customers are
deciding on their orders. Plus having it bound in a 3-ring binder they
would have the added benefit of something to write on - without having
another thing to hand out (lapboards). And by using the view binders - you
have pockets on the inside of the binder for DPS, and you could use the
half-sized hostess specials from Tealited.com each month to slip in the
front cover - a great booking visual.
Do you still give cattys out freely - OF
COURSE! As several have pointed out - they ARE the cheapest form of
advertising you have. But as others have also pointed out - VERY RARELY do
you actually get a call out of nowhere from someone who took a catalog
home that you haven't personally followed up with. SO if you are handing
every guest a catty to keep whether they want it or not - average 10
guests at a show - 3 shows a week - 30 catalogs a week - can you afford
that kind of expense? Again - an individual decision for YOUR business. Do
what works best for you.
Several Suggested Folder Options:
1. Custom sized Page Protectors - but taken to an office supply store to have bound
together instead of the custom sized folders due to the increased bulk of
the additional pages of this year's catalog. (Suggested by Rachelle -
cost: plastic protectors - $3/25, plus +/- $2.00 for binding)
2. 3 Ring Custom Sized binders (5 1/2 x 8
1/2 - made by Avery and available at Wal-mart and other Office Supply
Stores) with individual pages laminated with contact paper. NOT
recommended! Yes, it looks great. ONE completed folder took me over 2
hours to complete (finished it up around the last two minutes of the
Chiefs game). And was a pain in the patootie. And would be expensive to
create. One folder used over half the roll of contact paper ($5.74 per
roll)
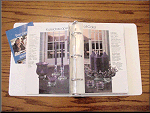
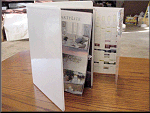
3. Custom sized Page Protectors with metal rings. I did another folder
using just the page protectors and binder rings (because like Rachelle - I
think the catalog is way too big to fit within the custom pocket folders)
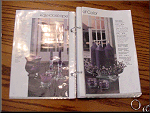
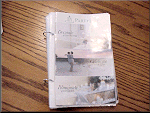
4. "Mini Clip Case" ($4.97 - at
Wal-mart) for functionality, but not for appearance.
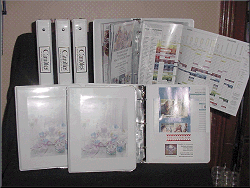
5. HIGHLY RECOMMENDED but most expensive: 3
Ring Custom Sized binders (5 1/2 x 8 1/2 - made by Avery - $2.97 each) +
3-hole punched page protectors to fit (we found them at Michael's in the
scrapbooking section - "B Creative Junior Page Protectors" -
2.99-3.29 per 25)
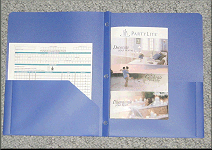
6. Regular size (8 1/2 x 11" - in
school supplies) vinyl pocket folders from Wal-mart & magazine holders
with catty taped in (Steve)
How To: I finally am satisfied
with my catalog presentation. (1st picture)
I got the plastic magazine holder, taped my catalog to it (2nd picture),
then cut off the strip that goes in the middle of the magazine (3rd
picture). My cost? .25 for each magazine holder, .33 for the poly folder
from Wal-Mart, plus the cost for the clear heavy mailing tape. A very
affordable option for those scared away by the cost of the sheet
protectors and binders. Plus with this method, I am ready in case the
company goes back to the full page/Holiday format. Hope this helps
someone.


7. "Binder Strips" (to be used
similarly to #6 - hopefully someone will send some pics because I have
never seen these)
I RECOMMEND leaving the candle chart size
intact (don't cut apart) and laminate the entire length using clear
contact paper, refolding it to fit just like it is in the original catalog
layout.
1. Just open the page out (it's actually
kind of 3 pages worth)
2. Pull the backing paper off a section of the roll of contact paper,
laying the clear part sticky side up on a flat surface. (I left it all
on the roll and cut it as needed)
3. Leaving about 1/2 to 3/4" of extra contact paper on the far left
side (where the staples WERE), put your candle chart on the sticky side
of the contact paper. Press carefully to even out all the air bubbles.
4. Now peel the backing paper farther - so that there is enough sticky
contact paper exposed to fold over the unprotected side of the candle
chart.
I found it worked better leave the contact paper flat on the table and
fold the candle chart onto it. Again - carefully press the air bubbles
out.
5. Trim excess contact paper off around the edges with an exacto knife
or scissors. (Be sure to LEAVE the extra double thickness of contact
paper on the left side so it can fit into the binder)
6. Punch 3 holes in the overlap so you can add the foldout chart to your
binder.
Another option from previous years:
Folder How To's This page last
updated
July 06, 2005 
|